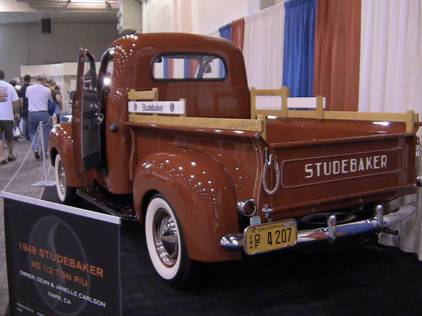
Diary
Page 21 - 7/26/11 to 4/16/12
BACK
NEXT
The right side, more finished, took a lot more work, and LOTS more cutting and grinding and drilling to get apart. We’ve basically established the proper height for the right side now, and JJ will return in the morning with some 12 mm x 1/.75 bolts, which will have their heads cut off, and the shanks welded to the frame to receive the running board brackets. This will open the rear fenders to some modification, the running boards themselves to further refinement, and give me a stopping place for the front clip to rest.
7/27/11
JJ got 7/16 x 14
bolts instead, just fine. We welded the studs in place, and after
several on and off the truck fittings, got the right side looking good,
bolted in place, and with some backing welded in for one of the front
area bolts.
The left side needs the brackets drilled and four studs welded in the same fashion. The left side panel was reset for appearance and as a template, and today JJ and I got a 4 x 8 x 3/16” foam board to make templates. We made both side panel templates, set them in place, and did some fiddling with the rear fender interface to the running board surface.
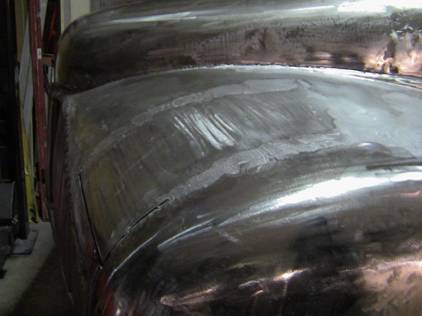
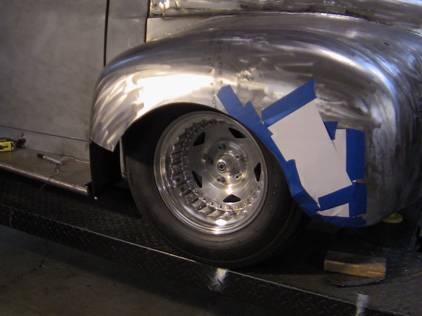
The right side front clip interface is already in front of the running board. The left was on top, and we have slid the surface metal back to allow it to allow drop down to the running board bracket as a stop. The front clip has “darts” welded in to continue the body sculpted lines onto the hood area. As received from Joe, the left side has markings and an arrow indicating it must go UP, the right side markings showing DOWN. We will cut the right side with a grinder, and the left side can be built up with weld or bondo at the appropriate time. The truck looks MUCH better with the correctly aligned running board lines.
8/2/11
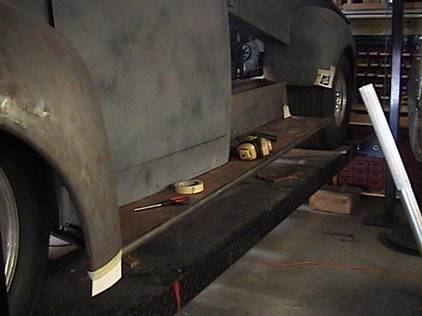
So those are the rear braces, and the mocked up assembly is shown above. We now have made the front half supports, which are more complex. We created a ¼ x 2” band of steel along the cab bottom on the left, and connected the existing brackets in the same way on the right.
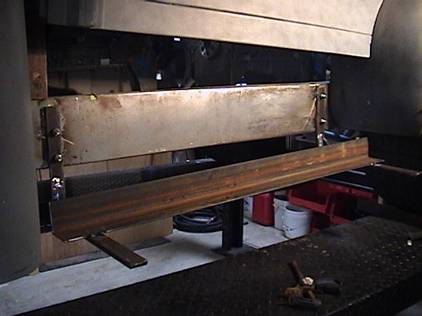
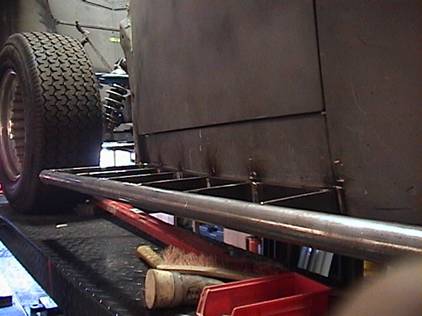
We welded studs to them, drilled the body in 5 places each side, and bolted the ledger to the cab. We have the outside rail in place, and are now making the 10 brackets to hold up the outer rail, welding 1-1/2 x 12” and shorter pieces, 5 per side, from the ledger to the rail to hold the down force on the whole assembly, Looks to be very strong. We were quoted $185 and THREE weeks to have 10 pieces cut at Industrial Metals. We will flame cut them tomorrow from our stock, and finish them with a Dumor grinder. 8/4/11
The torch made for rough cuts and lots of slag, so we ended up using a die grinder (cutoff wheel) and a Dumor to do the running board braces. We spent yesterday and today fudging the whole left side system around for level (in to out), and alignment to the bed (front to back height). We cut apart the fro
nt bracket on the rear half of the board, as Joe had made it going UPHILL (not square). So we have done MUCH cutting apart, remaking, rewelding, etc. The pix below show the left side running board structure as it is now. We are garage builders, not a CNC million-dollar facility. I will have to live with my own limitations in technology and craft. But I gotta say, what we’re doing looks pretty good to me.

It is within 1/8” all the way, the lower panel below the bed is PERFECT now, and now we can address adding some serious stiffening at the front corner by the cab. I will likely add some metal behind the cab sheet metal, and add a ¼” steel tab to extend the front corner to receive an additional brace there. This may also act as a stop for the front clip when it closes. The left side looks wonderful now being straight and plumb.
We have dressed the welds, and I intend to do some priming of the raw metal, perhaps even tomorrow, to retard rusting and the eventual further grinding, etc.
I felt very good about the three of us pounding, cutting, grinding, and fabricating over the last week. Jerkoff Joe could have done this SO easily. But NO, just deception and idiocy were the order of the half decade with him. I will put a call into Tammy Allen’s attorney either tomorrow or Monday, and see what they are doing (or not) with their own Joe’s woes.
We added ¼” bracing to connect the separate bolted brackets on the right side, so have a continuous ledger on that side as well.
I think I will cover the running boards with a rubber mat, custom cut (CNC process), with the KiloKub logo in red against the black rubber background.
8/7/11
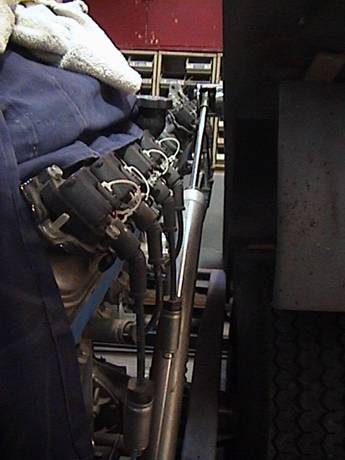
I spent a few hours today, Sunday, mocking up the exhaust and front radiator group. The exhaust will cross under the frame rails directly behind the cab in a box-affair about 5” deep so as not to be below any other hardware, about 12” long to get it from about 5” inside the frame rails to 6” outside the frame, with another box atop the outer portion another 5 x 4 or so. This upper box will receive one end of the Aero turbine shorty straight-through 4” in and out muffler. Aft of the muffler will be another box, about 6 x 6 x 24 to carry the exhaust either out the side of the panel above the running board, or a down outlet and just a non-operational 12-outlet escutcheon on the lower panel.
The radiator pack fits nicely under the hood at 13” high, 34” wide and about 13” deep. As noted previously, some sheet metal work on the underside of the hood/front clip will extend down to seal off these radiators. This will be a 4-unit affair, with fans either mounted on the insides of the pack with shrouds, or fan above or below to pull air through the assembly.
Kelly and I looked at the running board stiffening plans, and adding an inner backing plate of ¼” steel will help, but we need bracing to further stiffen the assembly so the bolts and plates don’t just soda-can the rocker metal.
At the rear of the running boards, the refined brackets are still flexing. I will add lower back-braces (facing the center of the truck) to these brackets with bolting up into the bottom of the frame rail. This should take care of the flexing. If not, I will lengthen the gussets.
The left front of the running board needs a second brace closer to the front fender, with another bolt through the very front portion of the side of the cab rocker panel.
I am close to trying an Electric Life crew jack pair on the front for opening and closing the clip. I would imagine some air struts would assist in all this. I need to come up with some alignment and receiving stand on the cowl/firewall with matching pad on the fender/clip. Many tilt hoods have a backward sliding latching mechanism. This does not appear to be necessary here. But some sort of alignment and down lock will be required. It could be as complicated as a micro-switch and another set of EL jacks to pull it down, or a latch system powered by the shorter jacks.
Tomorrow will see some temporary braces to hold the muffler and mockup boxes in place, and some research on shorty headers.
8/15/11
We did some serious work on Friday, and all day today as well. We pulled the running boards off, added the “joists” from the ledger to the outer tube/rail on the right side, added a second piece of 3/8” x 1-1/2” to the bottom of the 4 rear angle braces (much stiffer). Straightened out the right side sag in the middle and then spent the remainder of the day finish welding every joint full-length, and grinding all of this down flush. These pieces are starting to look real good. The back braces work GREAT, and we did lengthen the gussets as well. So we have done three stiffening actions, and all have paid off nicely.
Tomorrow we’ll attack it for perhaps an hour, then I have to go to a bid in downtown LA, while JJ and Kelly run to the Rodriques job.
We’re getting better at this, and making progress. This is way more than could ever be said for Joe. I have not yet called Allen, but will do so tomorrow or Wednesday if I can remember early enough in the day. I’ll take some pix of the full running board assemblies off the truck after we finish grinding the welds tomorrow. I intend to primer them.
8/18/11
Another day has slipped by without calling Tammy Allen. Perhaps tomorrow.
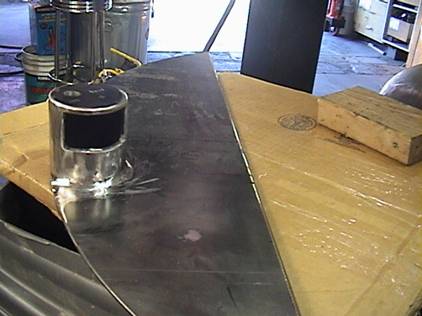
We worked EARLY at Rodriques, shoveling dirt and carrying HUGE lumber, and got back and started on the KK at 12:30 PM. The running boards remain bolted in place, and are strong as stone, and we were working until after 5 PM. We worked on the lift system, snapped a few nuts and bolts off in the process, and came up with a 3” circular tube mounting for the top (thanks to a suggestion from Kelly), and JJ has fabricated two of those tubes. We tested one, and it is correct. We are modifying it to be a little less tall than its current approximately 2-3/4” by about ¼”, and we’ll be cutting a ¼” thick cap to go on it, through which a ½” shouldered bolt will reach a nut welded to the inside of the new fender well ¼” steel plate. We snapped this welded nut off today doing a test. It will work fine when re-welded (properly), and when be used as a receiver for the “axle” bolt, and not tweaked sideways under 300# pressure.
I’ll shoot some pix tomorrow. We have to make a similar “can” for the bottom mounts, and then we should be good to use the air rams. I will ultimately have to hook up the control panel I made. But for now we could just give them a squirt from the air compressor to function.
8/20/11
We made the lower can, and I have it temped in place. There is still a little trimming to do to clear the air valve on the ram. I will need to go to Numatic Engineering (I hope they are still in Glendale) for a compatible ¼” pipe fitting street “L” to turn the fittings parallel to the ram. There is another “air actuator” shop at Victory and Burbank in Glendale as well.
The design looks cool to me with the round “cans”.
8/23/11
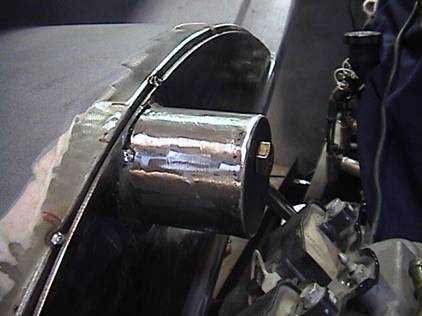
JJ and I went to Numatic in Sun Valley, then right down the street to Industrial Metals and got a 3’ length of ¼” wall 3” diameter tubing. We started with cardboard tubing, graduated to muffler tubing, and now our REAL DEAL stuff is mondo-thick ¼” wall.
We have had to relocate the mounting nuts a few times, as we discovered this morning that relocating the lower nut upward put us back in interference with the water pump outlets, notwithstanding our low-profile cool Numatic “L’s”.
JJ and Kelly are grinding on the lower cans right now, as I have just welded the lids on.
We need one more mounting nut for the passenger side, which we’ll get in the morning.
As soon as Kelly is done dressing the longer lower cans, I’ll weld in the driver’s side. I did some touch-up welding and dressing, and welded the can in (the upper part for now as the lower part requires lifting the truck up. I cannot push it back onto the lift without Kelly or JJ, and now the lower part of the ram housing is hitting the lower cutout lip of the can. I need now to relieve about a half inch of that lower opening to allow the bolt to find the nut easily (which it does without the ram in place), and will do so in the morning. We have PLENTY of lift height from the rams as set now. They will actually lift the bed about 7” higher than the picture below.
I saw some cool control modules at Numatic, but what I have should do just fine. I MIGHT need a couple of control valves for the front system, as it appears I’ll be using air up there after all. My former Funnycar control board has a switch for the front actuation, but it was only single action, and I need push and pull, and the associated valves.
It is exciting to be back in the creative and progressive mode after a half decade of screwing by Joe.8/24/11
I spent a LOT of time welding today. VERY hot. SO much so that I was literally looking out from under water, as my glasses started to fill up! I welded both the top curves of the wheel well tub plates (1/4” thick plate), about 3’ on both sides, the bottom junction to the bed, another 5’ or so, and the lower lift “cans”, another foot or so of weld bead. This is hot, tedious, exacting work. My welding is improving, though I seem to have contamination issues, as my welds look like lava volcanoes from time to time.
By and large, I’m laying down MIG welds that look like decent TIG “rolls of nickels”.
The three of us worked on the lift system, made spacers, shortened bolts, relieved the perimeter of the heim joints, trimmed two cans for clearance, and pretty much got the system ready to receive some air and test it. I believe I have enough fittings and some tubing to test it out. Tomorrow should be exciting.
I asked JJ if he was enjoying the fabrication. “No” was his answer. “But I’ll like it when I see it work”. I relish ALL the work, and like him, am anxious to see the performance. What we’re doing looks pretty good, shows thoughtful workmanship and engineering, and I hope it shows well once done.
My other cars have seemed to inspire the viewers, so that is comforting and reassuring.
8/26/11
Today JJ liked it. I modified the old control panel from the Funnycar, plugged up some orifices, went to Numatic for some additional fittings, and basically hooked up the lift system as in days of old.
Worked perfectly!
Kelly was shocked and amazed. JJ was not having fun, but was pleased. I did some long thinking last night both going to sleep, and waking up. I came up with two systems for the front. JJ and I tried the knee-action version, and then I thought of a third way, while standing at Numatic. Then we came home, and a fourth option presented itself, and that is how we’ll go: 18” stroke rams with about 120# of lifting power each at 100 PSI. We’ll have about 125 PSI with the power brake pump. We’ve done some measuring, and it looks good. We’ll go from the bottom of the frame rails just ahead of the A-arms, straight up into the bottom of the hood and fender junction. I ordered them today from Numatic for around $200 for the pair (special order from Bimba), available in about a week.
JJ is cutting some bracket material right now to allow me to pin up the mock-up foam tanks.
I’ll work on the cold and hot water mock up tanks shortly.
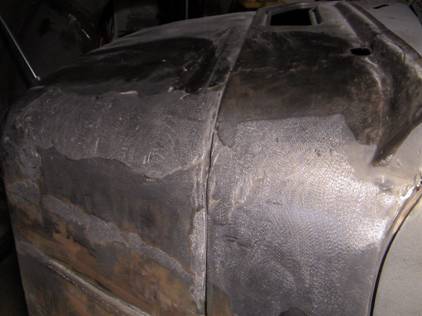
A fairly immediate concern is how to stiffen the front clip. The fenders flop like elephant ears. The main point of flex is the junction of the fenders to the hood, particularly at the rearmost portion of that interface. Randy suggested fiberglassing the underside of the whole clip. This seems like a good idea. He also thought some stiffening ribbing would be appropriate. I agree. I will endeavor to design some ¼” by 1” backbones for that hood to fender junction, and carry that around to the trailing edges of the fenders as possible. There is, of course, tire clearance to consider here. I’ll have to install some temporary struts across some points with the clip DOWN, in order to insure it fits. There is also the tricky interface between the rear of the hood and the cowl, an area not addressed by Joe in his half decade of lassitude. While I would prefer Nick to do this, I cannot wait for such largesse on his part. I’ll do my stone age creativity as possible on this and get on with it.
8/29/11
I confirmed some specs with Numatic today, and the rams are on for later in the week. We removed the mock-up of the other proposed lift arrangement, cut off the temp tabs, and launched into some stiffening of the front sheet metal.
I connected the inner grille framework support to the front sheet metal along the sides, with only a small improvement in stiffness. We are going to add ¼ x 1-1/2 strapping above the grille frame and attach that assembly along the whole top rail, about 5 LF or so. This should add some more stiffness. However, the fenders from the junction of the hood back are floppy, so some ribbing coming from the nose area of the hood and extending along the hood line under the fender junctions may help.AND, we have to get the left front fender to tuck in at the rear and move tighter against the cowl/body. There also remains a complete refitting of the hood to the cowl, and there are several thoughts on how to accomplish this. One is to extend the cowl edge and not mess with the hood (floppy) metal. Another would be to add a ½” rod perimeter to the hood, and patch in sheet metal (about 18-gauge). Nick has noted previously he is not in favor of the extend-the-cowl approach.
I can accomplish proper alignment by pushing on the fender, but clearly some structurally correct alignment must be done. Whether this mean cutting and re-shaping the fender or what is unknown. I SHOULD have Nick come over. He is swamped, and not amenable at this time to such philanthropy.
9/1/11
Nick came by last night, and we discussed at length his emotions about the project, and his technical approaches to the hood, etc.
He suggest building a “birdcage” to define the properly-gapped dimensions of the hood and fender openings using 5/8” square tubing or round rod, then filling back to the existing hood and fender sheet metal from the perfect perimeters.
I understand this approach, and if Nick cannot bring himself to work on the truck, I will do my best using that (pun intended) framework.
The KK is trapped up on the rack right now as I am having the cylinder rebuilt which powers the lift. It has lost a seal, and for $350 it is out, being repaired, and will be back in tomorrow, ending the dripping onto whatever car is parked below.
This is a MONSTER cylinder, extremely heavy, and requiring very specific parts.
9/3/11
Jaime returned yesterday and put in the ram.
All good.
JJ and I are moving toward starting the “cage”. We cannot use 5/8” square tube, as it is too high for the cowl interface. We’ll probably end up with ¼” flat bar about 1” wide. I hope we can buy some, otherwise we’ll be cutting my stock down, an arduous task.
I got the Numatic rams, and they are about 6” too long. I have relocated the lower pivot point back to my original rearward place, and it appears the opening will be just right. I have to make a hood plate and eyelet to receive the clevis on the rams, and once in place I will find out immediately if the system cycles properly. I was grinding a tab down this afternoon before I had to leave for tennis. I’ll resume on this in the morning.
9/4/11
I relocated the pivot points back to the more front place, about 6” back of the very front of the frame rails. These work for length. However, three problems have arisen:
1-I dented one of the rams when I closed the clip last night. It is a very minute indentation, but enough to freeze the piston inside, so there went $100. And since tomorrow is Labor Day, no one is open until Tuesday. This looks like a Friday replacement at best.
2-The valving does not seem correct, as the ram does not respond to the switching. I ran it direct off the compressor, and the up function works. The down is hard to assess, but probably works on the direct hookup as well.
3-One ram is not enough to lift the front clip.
9/7/11
The valve was OK, I had it plumbed incorrectly.
Bob Sweeting was here and managed to get the dented ram functional. But still not enough poop, even with both rams working.
I then worked out the geometry with the longest electric rams I had bought for this very purpose, and modified them with slightly larger holes, and mounted the left side with the same heavy-duty “can” affair as the rears. Tomorrow JJ will make the right side, I’ll weld the chassis nut in place, weld the can in, and we’ll see how these work. Hopefully well.
9/10/11
JJ did make the right side, and I mounted it intentionally higher up the frame rail, as the measurement from the hood to the mounting point demanded it. I did NOT account for the twist in the hood, which was being held by the left side only. I had to then cut it all off, redo it, and remount it.
Works just fine.
Bob had noted we should create a sliding pivot adjustment to get the hood assembly closer to the cowl, which at present is about 1” away.
We took a more direct approach and redrilled the pivot tabs an inch closer. The fit is better, and will now require:
1-rewelding the faulty nut Joe had put in the pivot arm
2-trimming hood metal near the cowl.
But hey. Getting it closer.
We may still end up with Nick’s “cage” approach, but at least the front clip is closer than before.
I had an unexpected conversation at Bob’s tonight with Rich Almack, a former stereo installer and car builder who noted Joe had screwed him on a trunk lid repair. Basically the same crap as me, just smaller and quicker.
9/12/11
Kelly spent the day grinding on the underside of the front clip. We, in fact, turned it over on the ground so he was actually sitting IN it. He made a mountain of grinding debris, and dramatically cleaned up the underside of the clip.
I did a little dressing on the welds around the front “cups”, and they now look nice as well.
When all this stuff is bondoed and painted it should present quite nicely. The “cups” are quite intriguing.
JJ and I took a trip to Industrial Metals and got 20 LF of ¼” x 1” flat bar to make the cage and the interior stiffeners for the front clip.
Here we go.
I also welded in the two front pivot nuts, which Joe had simply lightly tacked. The right side fell in, the left side was rattling loose. I ran a tap through the nuts after welding and got them clean. All good there now.
9/14/11
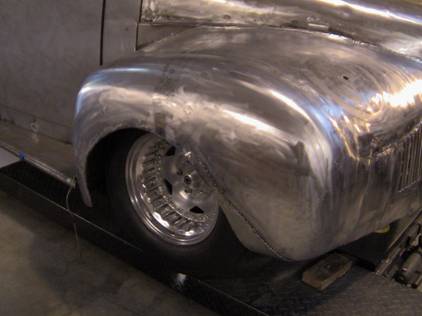
Nick had previously seen the truck a few times, and both times felt a major overhaul of the front sheet metal was needed. He suggested a “cage” to outline the perimeters of the fenders, hood-to-cowl, etc. Not being a metal fabricator, my mind does not easily go to cutting, bending, etc. on metal. But we were at a point where we could not get the front clip to sit well, and I certainly don’t want to fabricate a cage and try to twist the front end metal to it. So I launched into cutting reliefs in the hood, cut loose the fenders about 2/3 of the way to the front area, and redrilled several times the front mounting points, hoping to get the sheet metal closer. After two days of many holes, many cuts, lots bending, we have the hood DEAD center, and with tolerable gaps and alignments. This is BIG. There remain many areas of sheet metal to be repaired, but we have roughed it in pretty close. We can now start on the cage portion, knowing we have the front metal laying right where it needs to be. We have created piles of metal particles in the process, and copious sweeping and showering have been necessary to clean the shop and us up after these processes.
Tomorrow will see our first attempts at the “cage”.
9/15/11
We did not start the cage, but instead spent all day further refining the closure, fit, and function of the front lift system.
It turned out we were pulling it down about .390” too much with the 30” long electric rams, enough to cause the fenders to pinch on the ramped interface along their trailing edges where they meet the body.
The “ramps” end up distorting the fenders if they get pulled down too tight.
We cut the earlier
tabs off, made new, re-welded, and they work fine now. I also cut out
the right “dart”, which was not aligned with the body, and made a new
stitch” to hold that area together for now. We’ll remake the left
side “dart” as well. We’ll start the center part of the cage tomorrow,
working out from the center of the cowl, probably using 6 pieces
ultimately welded together. The fenders will get round rod perimeters.
Nick has been too occupied to come here again, so will get an eyeful next week when he finally drops by.
9/17/11
JJ and I went further on the hood, cutting out the left side dart, putting on some “hold it” bars to keep the hood and fenders aligned, and directed our thoughts to ramps, locking devices, Teflon strips, etc.
Our next move is to install the steering column and brake pedal assembly. This will open up the interior to more fabrication, such as shaping the dash, laying out the seats, etc.
Bob Sweeting suggested Henry’s Machine in Orange County for cheap axles for the CV joints. Monday will find me calling Henry.
No listing in Google for this shop.
9/20/11
I popped the running board front half metal off, made a matching corbel post, and tacked it in. Then I realized I made it 2 x 2, not the correct 2.5” x 2”. Off it came, and I cut up some more 2 x 2 tubing and piggy-backed it on. All back in and correct now.
JJ did not show today, so perhaps he and I will attack the muffler cover panels tomorrow. We have a fresh 4 x 8 sheet of 18-gauge metal in the back of the truck, ready to go. Nick claims he will stop by around 9 PM tonight to look at the Frankenstein work I’ve done so far on the hood. JJ and I will also likely start on the cage as well.
Another pair of important issues are the steering column and brake pedal locations. These are definitely two-man operations.
9/22/11
JJ returned today, and we whipped on the darts. While the following pix will nowhere near depict the progress, nonetheless we have achieved a milestone:
We completed the hood work as far as rough metal goes. We had, in the past two weeks:
Made cuts in the hood, centered the front clip, cut back the overhanging edges at the cowl (formerly not even within ¾” of touching the cowl),

leveled the front clip, pinched in the sides, and cut out the incorrect darts on the sides of the hood/fender junction. In order to keep the hood aligned, we put outboard struts, then fabbed up the darts today.
We then removed the braces and the front clip remains perfectly aligned. We made up one sample, then went to Harter Sheet Metal and had him bend two edges of a 31 x 14 flat sheet of 18-gauge metal. We then cut that rolled double-edged sheet into two darts, and after several trimmings, welded them in.
>BRILLIANT!
Nick failed to show again last night. Just as well, as we have made more progress. I am confident I can take this thing quite a ways down the road now regarding the bodywork. There are gaps to correct on the doors, and I have a plan to weld backing strips, then grind them to finished gaps. Nick may have some other idea, which would be good. Otherwise, that’s next on the body list. To repeat from a few days ago: I have to get the column and brake pedal in. We’ll do that shortly, maybe even tomorrow.
The hood lift system works fine, and puts the fenders RIGHT back in place. There will be only a slight amount of fabbing to do on the lower edges to get them to mate exactly, and some centering devices to drop them into place every time.
9/25/11
Nick showed up Thursday, and was highly complimentary, He repeatedly said “GREAT” regarding what has been accomplished.
This is good.
I pressed him for some additional hints as to how to proceed. He again suggested cutting out the wheel wells, fabbing rod, and bringing the metal back to the revised opening. I now recall I did this exact thing on the Funnycar about 15 years ago, and of course had never done any such work prior. This was in fiberglass. Now we’ll do metal. Nick offered to lend me a hammer and dolly and shrinking hammer. I need him to show me how to use them.
JJ and I did not get to the steering column or brake pedal assembly. As I am now just about broke, as in owing thousands more than I have, I may have to stop JJ’s involvement, unless he wants to work on a credit for when some lump sum of money lands.
Nick may go with me and Bill Marigold to Winfield’s show in Mojave in 2 weeks.
9/26/11
JJ has consented to work “on credit” until I get some cash again.
We 3 jumped on the door gapping today, and essentially got it all done in metal. There will be, of course, some minor bondo work to perfect the edges and levels. But in our case, VERY little.
We cut the drip rails off, then started adding 18-gauge shim strips. It turned out not to require as many as I first measured, given the heat, welding, etc. But we ended up with 2 layers in many places, and a few areas took 3 shims.
JJ cut these from our sheet of 18-gauge, I easily bent them to fit, and started tack-welding. We then came back and started grinding as needed.

The final gapping looks like this:
So I COULD do some bondo work now just to make it look better, but I think I’ll wait until Nick has seen this stage and approves
We got both sides done.
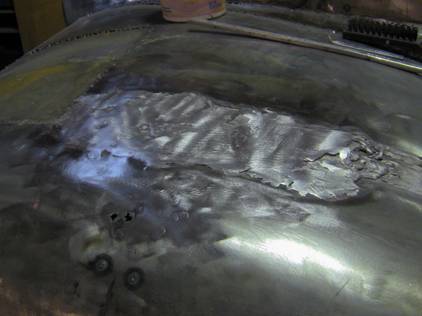
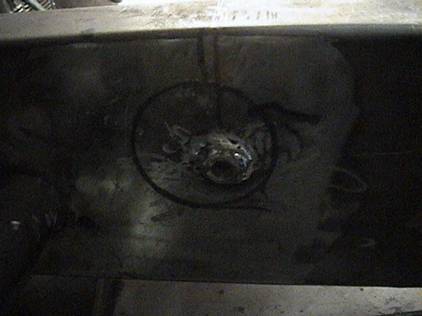
I noticed the front clip sheet metal flexing over the subframe surrounding the grille area slightly when I tipped it forward and rested the nose on a milk crate. I had beefed this area up previously with some results, but I saw that even more tying together was needed. This is mostly due to the fact that the welded seams connecting the front metal to the hood/fenders/subframe are incomplete. I will start on completing that tomorrow, but will add some metal from the existing onto the subframe, after I do a little more welding on those earlier seams.
I also added some beefing to the front hood support in the middle, and this first picture shows before the addition of the center “beef” plate:
Here it is after the center plate install.
I will tie the front sheet metal more securely to that subframe tomorrow.
I spoke with Preston at Tammy Allen’s Museum, and brought him up to date on my project and the Joe thing. He said they appeared to be going the same road, not going after him for their money, just looking to get their cars back. I offered to help that happen, and also suggested I could manage the completion of those projects here using expert people. Allen has a museum and presumably a serious shop attached to it, so may not need my help there.
9/27/11
JJ and Kelly and I continued today, addressing brake pedal mounting and steering column. We were all ready to weld in supports for the brake pedal assembly when I realized the steering column will need several u-joints, and the column path may interfere with the brake location. So we switched, did some mock-up of the column (just a short little 16” head unit), and kept it bundled up in its foam wrap and foam box cover. We cut open the floor for a 4 x 5 opening, and determined 3 more u-joints and two support bearings are needed.
I will go to Hawaii Racing tomorrow for those. Given that we can get these mounted, I’ll need to come up with a column drop of some sort and front support for the head to mount it all.
The doors look good gapped, Nick did not show, so we continue on.
I finished the day spending about a half hour solid welding under the front clip. Got REAL hot there! I’ve closed most of the gaps in the front sheet metal attachment to the “core support”. I may divert to other aspects of the front end strengthening as needed tomorrow if things get slow.
9/29/11
Nick dropped by last night, and reiterated his praise at our work. He gave me a little hint on stitching the cut panels together on the hood. Nick felt I did not need a second Heim joint bearing support on the column “snake” of u-joints. We’ll get the first one in and see. I have to find a steering wheel to borrow for now (I am WAY broke here).
JJ and Kelly and I started on the support plate for the steering column bearing, and JJ got frustrated and drove away. He and I apparently look at the visual on things in nearly opposite ways, and he just flipped and left.
Kelly is here, and I will work on the Heim joint plate momentarily. The brake booster looks like it will fit in our originally intended location just fine.
9/30/11
Kelly and I finished making the brake assembly mountings, welded them up, and Kelly ground them smooth, although they were pretty darn nice for MIG welds. No JJ today. I have NO idea what is going on with John, or if he will EVER show again. Wow! I spent the morning welding up the remainder of the front hood gaps, grinding them down, and doing a little carving around the grille opening. The brake pedal assembly is ready to go in, and Power Brake Bob is coming Monday to start the brake install process. He has a video install for his YouTube 4-car install on Tuesday at Dick Guldstrand’s shop in Burbank, so will stay here Monday night. He may return after that to continue on the brakes.
I’m going out now to weld in the brake assembly.
We got the assembly, in, then added additional bracing around it, as the firewall tends to “tin can” a bit. It is all in there solid, way strong, and permanent.
Kelly is just finishing up grinding the welds as I write this. All in all, we got a lot done in there today.
I should have looked more closely, and bent the braces, which would have avoided bending in the firewall, The firewall will get floated, coated, perhaps sheathed, and covered with electronics, so it probably matters little aesthetically.
JJ and I had talked the other day about how cool it would be to trailer the KK over to Bob’s. His wife, Judy, loves the unfinished “stitches” and rough metal and would prefer it stay that way.
Not I.
Paint, baby.
I’d have to get there at 1 PM in order to get the #1 spot. I also need to have the steering in place. Brakes would be good, too. But the steering is THE major deal. I could take a CO-2 bottle to run both the bed lift and air brakes, and a battery to actuate the front tilt system.
10:56PM
I did some work today (Sunday) on the column. It turns out the #2 u-joint was binding.
I examined the joints and each showed a slight binding. I COULD have done some hand grinding on them, but I chose to simply reroute the path to avoid 45-degree bends. This has required remaking the mounts altogether. I will look to complete the change tomorrow with a new lower mounting plate (already made) ready to weld in place. I’ll modify the very trick upper three-legged mounting, and add a third joint at the rear of the tilt column.
Power Brake Bob has arrived this evening, so will commence working on the system in the morning.
10/4/11
The upper (third Heim joint) did not fully correct the looseness. So I am adding a fourth Heim down low, and rem
oving the mondo plate I welded into the body. So some panel replacement is in order there, about 4 x 6, no biggie. I will buy another column drop per PBB’s thought, and build another stop up there.The steering wheel runs through from side to side smoothly now, with no weight on the tires.
I called JJ, and we worked out his three issues. We have concocted some code names for each of the three offensive actions, and he will clue me in when I do them.
It’s all about communication.
Per Kelly’s insistence, I added two flat bar bracing pieces at the front upper corner of the brake pedal mounting area. This added a very small amount of stiffness. The major wobble in the column is near the bottom between #3 and #4 (from the top) joints. I am adding another Heim joint there.
10/6/11
I added the fourth Heim, tightened up the column drop, and it is quite good now. I cut the old lower left mounting plate right out of the body and relocated it. I will now take the brake pedal assembly and remount it 1.5” higher, rotate the upper Heim joint, and relocate the #2 Heim joint up to an upward mount, cutting out the rather nice three-legged affair I just welded in.
So goes the process.
10/7/11
I cleaned all the column stuff out save one Heim mounting. I ordered a 7” drop from Summit, so I will have to wait until mid-week to continue. It looks like I can eliminate two Heims, perhaps three, and at least a couple of u-joints.
The brake pedal is back in, higher.
I moved onto the hood area and am filling in the welds at all the seams, grinding as I can, “healing” the stitches if you will. I have difficulty getting the MIG to weld below about 15 amps, which of course burns holes in the sheet metal. I tried 12-14, and it just doesn’t do it. This is where TIG would be better. Perhaps I’ll try the torch next week.
Power Brake Bob has some interesting (and good) ideas on the exhaust. He suggests using 6 boat mufflers, each about 5 x 12. I think I might be able to squeeze them under the motors, with at least one each in the front cavity of each pan.
10/9/11
PBB called today and said he had pitched a sponsorship exhaust system to Gibson, who appeared warm to it. So we’ll get the steering back in, and if Gibson says yes, we’ll get it on a trailer to Corona later in the week.
Nice going PBB!!
Also saw Gene yesterday and Bob today from BE Customs, and we chatted about the progress on the KK. Bob said give a shout when I needed help. I IMMEDIATELY said “help.” I have NO funds for their expertise, so other than a mercy visit I see no work being done by them in the near future.
10/10/11
I talked with Joe Ziola who asked that I check with him on Wednesday, pick him up, and bring him over. He is no longer allowed to drive because of his seizures emanating from a lifelong brain tumor. He appears to be recovering nicely from really trick brain surgery, and looks forward to coming over and being involved. He has a small 100-volt TIG machine, which I might be able to use in his absence.
I’m at a standstill right now waiting on the column drop. PBB is returning tomorrow night, and might get going on the plumbing for the air brakes on Wednesday or so.
It appears the column drop is coming from New Jersey, so I don’t expect it before Friday.
3:44PM
Got the Borgeson 7” column drop in the mail on Friday, and upon opening it today realized it was a 2” diameter, not 2.25” as I need. So I reordered the correct one, and sent the first back to Summit. This puts the column on hold until the new one arrives. Summit said they might 2-day air ship it. Whatever, PBB can start in the brake lines, mounting the master, the tank, etc. starting tomorrow.
I did some judging with Randy and others at the Fire Dept Car Show yesterday, and the Best in Show truck happened to be parked next to me, and had a trick double-action hood slider and tilt. The owner, Phil, is supposed to be coming over to look at the KK. I’m anxious for someone else’s eyes to look at the mechanical challenges and see different solutions.
11/2/11
Spent two days at SEMA and Apex, and I am EXHAUSTED. I have not done that much walking in the last TEN years!!
The explanation of the KK (no pix were handy) had a LOT of people interested I handed out perhaps 25 cards, got a lot more than that, tons of literature (well many pounds of it), and spoke with many people who had some interest and good products for the project.
But this just KILLED my back. Wow.
I also found the Miller booth at the end of the second day (a WAAAAAYYY long story), and they did not have a good enough deal on their new Diversion TIG machine, so I passed. I’ll pick up my old EconoTig tomorrow, and start trying to weld as possible with it. Sadly both my welders are not suited for low-heat applications, such as EXACTLY what it is I’m doing with 18-gauge metal on the KK.
PBB is working the show using the truck as a hook, and claims some interested parties there as well. He will stay through Friday (I’d be dead by then).
11/6/11
I was wrecked from two days of non-stop walking through Apex and SEMA. I came back to tune up the welders. The TIG does not seem to weld at all, just spark like a spark plug, then explode the metal in about 5 seconds.
The MIG is going a better job, as I replaced some parts on it.
I have been unable to get Joe Ziola over here yet to try the revised and repaired TIG. Hopefully his chemo and radiation are not knocking him down.
I ran some welds on the hood yesterday with the MIG, and will go out in a moment and do grinding to see how they did.
PBB claims that Gibson has agreed to do the exhaust, and had some potentially fruitful conversations with a couple of other suppliers, both from an idea and product standpoint.
I was driving yesterday next to a late model VW and noticing how the headlights sit. They are indeed horizontal and parallel to the road with the grooves inside the housing. So I need to create some arrangement to adjust the headlight body and get some metal work going for the “dormers” behind them. I have no idea why in the hell Joe wasted time pounding and stretching the fender around the left headlight, it just is nowhere close to doing what is needed. More jerkness discoveries await, no doubt.
The steering is in, so PBB can commence his brake work this week. He is scheduled to return some time this afternoon.
OK, off to the garage.
11/9/11
So Kelly and JJ and I have spent the last three days working the front sheet metal, as in polishing it, welding, grinding, adding, cutting, etc.
We have narrowed the gap from the hood to the cowl to 1/8” or less using metal only. We have a little more tuneup to do there, but it is quite nice in pure metal at this point.
The plan is still to take the KK to Bob’s Big Boy on Friday, IF NO RAIN. That would be disastrous to the fresh metal. We will likely put a couple of cans of clear lacquer on the metal Friday to be safe.
Kelly and JJ are both amazed at what we’ve done, and both are bullish on just trying anything that needs doing.
The headlights are a disaster. The right unit is broken in several places, has no good bulbs, and is scratched up.
The left needs a Xenon bulb.
I am checking with PBB as he gets Bosh and wholesale, for a price on two new lights. We MIGHT just use the lens, and substitute some other, simpler setup behind.
The bodywork is coming along as noted above, so we are going to press on come Friday.
PBB and I will prepare some solicitations/proposals for four
sponsors this coming week.11/10/11
Randy looked in on the KK this afternoon after the NHRA drags, and said he was shocked and amazed at what we had accomplished. He added, what we have done is very good.
So, on we go.
11/17/11
Kelly and JJ and I have put in some serious time this last week. I have spent MANY hours ferrying my TIG welder back and forth to DeltaTech getting it FINALLY fixed. First it was the board, then it was the pedal wiring, then something else, and finally the high frequency polarity was incorrect. Anyway, I am now learning to TIG weld.
During this, we finalized the side panels, building ¼” square frames and sheeting them with 18-gauge metal.
We then had to make a step out (about ¼”) panel using some 1/8” flat stock on top of the front portion of the panel, and again covered with some more 18-gauge.
This mated up the faces of the two filler panels between the bed and the cab. Much on and off the truck, grinding, back on, etc.
The steering needs to come out about 3”, as I test fit the old dash back in, cut out for the column, and the head needs to come back. So I need to remake the two column drop mounts, and put a longer piece of “D” rod in to allow this.
PBB and I have not yet done the sponsor letter. He has planned for his kid, Matt the videographer, to come and film an install here, and do some KK filmage. I have 7 hours of video, and untold hundreds of pictures along the way.
I will now need to organize those to allow Matt to do some compiling of the data.
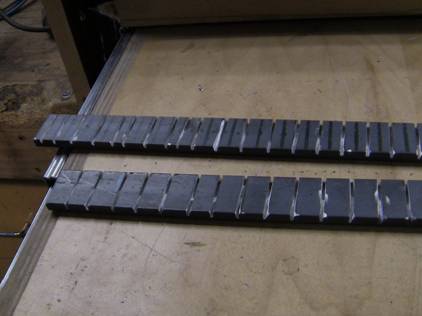
The right running board needs a new top, so we will likely cut the old one off and fab a new one. I WAS going to go over the old one, but I think not now.
We have to add support along the back half of both running boards to prevent sagging, etc.
PBB had some thoughts today about two areas of the KK. Firstly, as he noticed us beginning the construction of a tow bar system, he said I should incorporate the battery box into that.
Secondly, he said I need torque resistors of some configuration to prevent the crossmembers and frame welds from suffering under a half ton of torque. He is right about that, and I HAD bought and designed such a system. But then I realized I had to allow for exhaust, and came up with a narrower mounting system. But PBB is correct, so once the exhaust is finalized (by Gibson we hope, and soon), then I can get on with the final stren
gthening, X-members on the frame, etc.I am going to pass on Bob’s tomorrow, as I have a family dinner at 5 PM ion Brentwood. But we should have the tow bar done shortly, and I’ll need to go to Eckhart’s to get a dropped hitch for the dually.
The tow bar at this point will be bolted in with (4) grade 8 bolts, 5/8” x 5”. I MIGHT be able to alter the design and do what PBB suggests, either tomorrow or later. This would require making a separate bolt-on tow-bar receiver piece with tabs to bolt onto the bottom of this crossmember arrangement.
11/18/11
JJ got the Grade 8 bolts, and Kelly and I finished up the tow bar. Once ready to final weld, I realized it was about 3” too close to the ground. So we shortened the legs, and welded in the center section, with tabs done and complete.
Looks good.
It is now close to being able to do the PBB-recommended battery tray/crossmember thing. I’ll show PBB tomorrow and see what he thinks.
I got some practice in last night on the TIG. I need MORE practice. LOTS more. Welding the heavy tow bar stuff today was a joy. Just pour the current (set to 24 volts) to the beautiful open V-grooved weld pockets, lay the wire down at the 40-speed setting, and rock. NICE. This is what I would like to do with the TIG on the sheet metal patching. I need to call AirGas tomorrow to see if my .023” rollers came in.
I went to Eckhart’s and got a 10” dropped hitch arm and 2” ball, good for4 5000#, as the actually-needed 12” was just too low. I need to put the license plates on to tow it on the roads. Good thing the registration is current.
I MIGHT consider taking this to the John Force Show. I’ll do some calling to them, and check with Randy and a few others for opinions.
PBB has not yet started on my brakes.
I will probably now move to mocking up some seat, order the Old Air AC unit (unless I can get them to sponsor it), and extend the column backwards about 3” or so.
11/19/11
PBB was busy doing a brake job today. We will discuss the battery box and some other aspects tomorrow. Nick dropped by and again expressed high praise for what we’ve done. He again suggested doing a cage around the fender to finalize that. I will get on that shortly. He thought bringing in a welder by the hour might be a smart thing.
The TIG is operating better, and Ziola will be coming tomorrow to view it, and my virginal attempts with it. I do much better with a MIG right now.
Matt Sweeting was here to film Bob and me. Bob ran late on the job, so Matt will return probably Monday. Matt suggested several web-based things to promote the KK.
11/20/11
Got Joe Ziola over today to look at the TIG welder, watch me weld, and show me some tips. All of the above were accomplished. He thinks the MIG is faster and easier for most of what I want to do. The TIG will allow me to do some small, sensitive stuff, once I get the hang of it.
11/21/11
I ran a few minutes of TIG this afternoon, getting a little better. I’m not quite ready to use it on the KK as yet. I will get the .023 wire rollers tomorrow, and see how the MIG does with the smaller wire.
PBB is booked until Wednesday, AND we cannot find the air/hydraulic power booster. So he will have to procure another.
The weather for the end of the week is predicted to be rainy, so Bob’s using the tow bar is unlikely.
I will call Craig at the John Force Car Show and ask if the KK would be appropriate.
I will get into the fender “cages” soon.
11/23/11
I have attempted to get the TIG and MIG welders to work on sheet metal, so as to nicely complete panel changes, etc. I have small Tungsten in the TIG, smaller rod, and .023” wire in the MIG. I went to change the rollers, and the retaining device broke off. I installed it anyway, and I’m hoping this will work well enough to get me through until next Wednesday, at which time a replacement mechanism should arrive. Yuk!
Matt Sweeting filmed me and the truck last night. I have yet to see any of the footage.
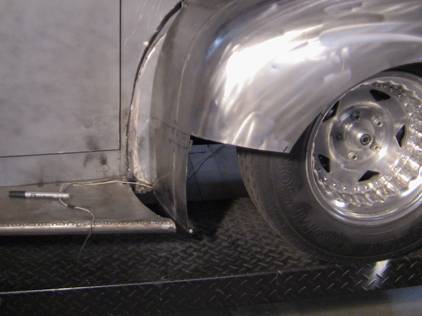
11/29/11
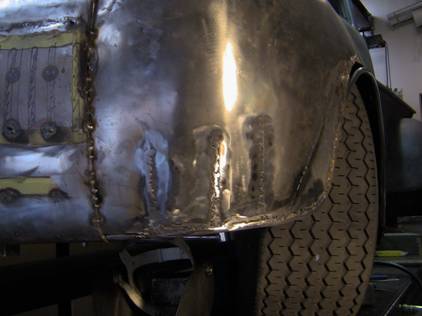
I FINALLY attacked the front fender conundrum. I cut the bottom approximately 1” off them to match the underside of the body and the lower edge of the running board.
I remade the ½” solid round bar Joe had put in there, changing the shape a bit. I then welded (per Nick’s recommendation) the sheet metal to the upper back edge of the round bar. It looks quite nice now. It is a solid-welded front seam, som back welding, and pretty smooth now.The “landing pad” for the lower edge of the fenders will be 3/8” plate, welded to the underside of the front edge of the running board. I have fabbed a new front edge and under-support, gapped the distance to the fender at about 1/8”, and we’ll pull the whole thing off tomorrow to add three rear braces, another front support, and weld it all up nicely.
SO in six months, we have made some SERIOUS progress, tightening up a lot of stuff. This is the surprising part to me, as I had NO idea I could do any of this.
Not that I would, but if the thing were to go to bondo right now, all gaps would look damn good.
I SO want to smooth
some areas with plastic, but this is WAY premature. So I keep attacking
the stuff I feared the most, and knocking it out.
PBB cannot find the air master and booster.
12/1/11
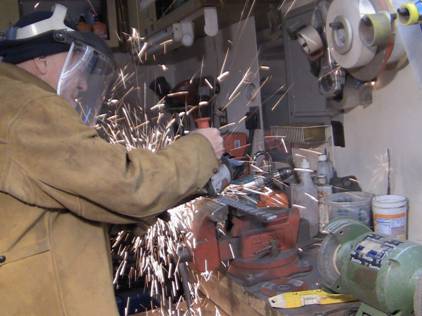
Man, we are on fire today. I mean LITERALLY. I lit my sweatshirt on fire from grinding sparks,
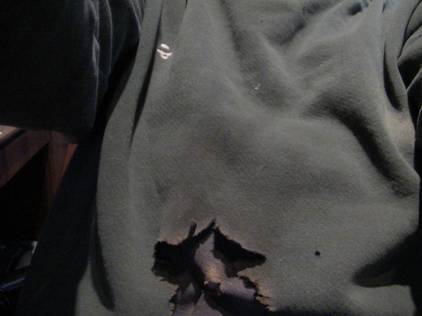
t
ried to put it out with my left hand, at which point the shirt MELTED onto my 4th and 5th fingers,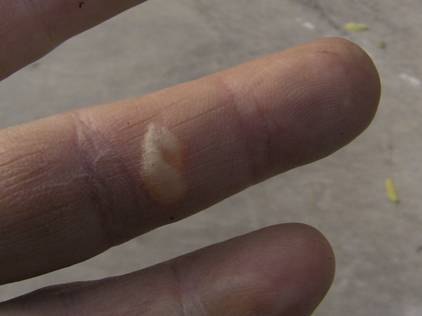
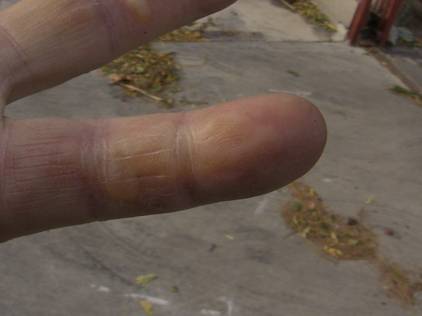
and continued the destruction. This went through my sweatshirt, inner shirt, and just touched my stomach. My fingers did not fare as well.
We then continued (after holding ice on my fingers for over a half hour) with tuning up the left running board. We got the pilaster finally SOLID and straight, and added a shim piece to the forward side. We also added the under braces to the rear half, put in three ¼” x 1” kerfed curved steel braces for the front, middle (around the curve of the cab), and rear edges, and ground off a lot of rough welds, etc.
The left running board is back in now, and once we put braces in the LF fender, we’ll finalize the gap at the front of the
running board. Right now it is about 1/8”, but we have to stabilize the fender before we sheet the top of the front of that running board. JJ is kerfing those braces right now.
These cuts allow the thick metal to be bent and curved as required.
12/2/11
The burned fingers had NO pain, until late tonight, when I had to dig up a broken water line. That ice technique is killer good.
JJ and I filled in the front piece of the running board with some help from Kelly, and I put in another inner fender brace.
The fender-to-running board fit is excellent. Once the front end is REALLY stable, I’ll add about ¼” to the front of the running board to tighten up the gap. But at a little over a ¼” now, it looks excellent. I’d just like it to be the killer 1/8” as is the rest of the vehicle.
So the left running board is pretty much handled for now. We still have to put the stop plate under the front lip, and come up with the centering pin and receiver, along with the locking solenoid.
12/8/11
In a nice twist of luck, a fellow named Crow was helpful to JJ and me at AutoZone. Crow is a customer, and knew where to find the two items we needed, whereas the store personnel did not.
Turns out Crow has his own shops (yes, two), has LOTS of cars, and came over to see our stuff. He drove the Tbird and called it a MONSTER. He loves the KK, and stayed for over three hours. He offered to do some free fabrication, as he thinks the project is great.
12/10/11
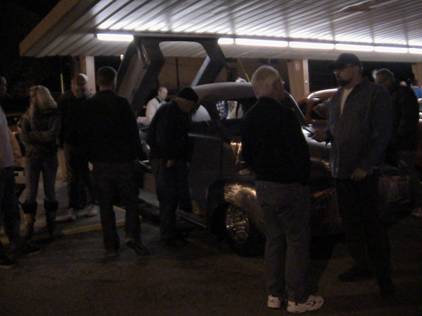
I got the two right front fender braces in, and put the wheel well opening rod in, as well as the trailing edge stiffener. All is welded in and done in that regard. It was cold and dark, but we FINALLY took the KK out for a ride, as in with a tow bar. We were going to go to Toluca Lake to Bob’s, but I let Mark (the manager) know too late to insure a space, so we went to Northridge Bob’s instead. We were MOBBED!
It was friggin’ cold, but we had about a dozen people around the car for most of the time. It was great to finally get a look at it from more than 5 feet away. We got some very nice comments on the car and workmanship.
12/12/11
It has been very cold and rainy, so little got done today as JJ returned home when he saw no one. Actually, the garage door was closed. I spent the middle of the day on a construction bid, and Kelly spent the day cleaning the 4-link bars of 5-year old tape and glue.
I have continued downloading videos from 2006 of the initial portion of the build, the part where Joe worked in MY garage and we got stuff done. It continues to irk me how much we accomplished in that 8 months, and how little he did in the next 4.5 years.
12/13/11
The downloads are complete, with 9 tapes total. I now have to find how to get timings on each segment so as to make notes, edit, export, etc.
Kelly’s efforts are rewarding: the 4-link looks pretty and new again. The Mark Williams rear came out nice after much bathing with lacquer thinner.
I have sent an email to Matt Sweeting, letting him know the videos are ready for his perusal, and asking for some advice on the above editing questions.
I confirmed with Mark at Bob’s Big Boy in Toluca Lake that I am indeed bringing the KK there Friday. All is good.
We did some air brake master bracket refabrication today, as the location was about ½” too low, even in its revised location. So MORE welding, cutting, filling holes, making new ones, etc. It is in and good now. Bob is supposed to be bringing his demo air system up (hollow for now), to set in place and from which to plumb the stainless brake lines.
We MIGHT have brakes by the weekend.
The steering column still needs to be relocated back about 3”. I have not gotten around to making the temporary driver’s seat as yet. I’ll press on that tomorrow.
12/15/11
PBB brought some brake lines and fittings home today. He MIGHT get some installed tomorrow. We are going with stainless steel (not to be painted), with trick stantions. Gotta make that seat tomorrow for the run to Bob’s.
It got REAL cold today and rained late this afternoon. While rain is not predicted for tomorrow, if it looks bad, we don’t go to Bob’s.
Here is a quick overview of what we did in five months:
1-remade the running boards completely with dramatic upgrades in stiffening and alignment, mounting, etc.
2-Cleaned all the desert-sanded and baked tape and glue off all the suspension components
3-cleaned the Mark Williams rear
4-installed the air lift system on the bed, including resetting the pivot holes, with ¼” steel wheel tub plates, etc.
5-installed gapping panels at the front of the bed, both sides, to 1/8”
6-built the left side corbel pillar
7-gapped the doors to 1/8”, all in metal
8-corrected some hinge interferences
9-reset the front clip using new mounting holes, aligned, leveled, pinched the hood, and gapped it to 1/8”
10-installed perimeter caging on the hood, front fenders, and wheel well openings
11-installed the Electric Life lift system on the front clip
12-made new hood darts on each side
13-welded and ground smooth lots of seams
14-installed strengthening around the grille frame
15-added inside flat ribs on both fenders
16-installed a tow bar
17-set the steering column (three tries), now just needing one more refinement
18-mounted the air brake system under the left floor with a service hatch above
19-mounted the air brake pedal and valve
20-installed stiffeners under the cowl and on the firewall
21-set the motors back in (not final alignment)
22-arduously cleaned the wheels of 5 years of exposure to the chromed and polished surfaces. The tires are now junk from weathering, although they were brand new.
23-welded the rack mounting back secure
24-cut/caged the front fender bottoms to align with the bottom of the running boards and body
12/16/11
The KK is sitting at Bob’s. We will be going back in a few hours to sit with it for the evening. All went well getting it there.
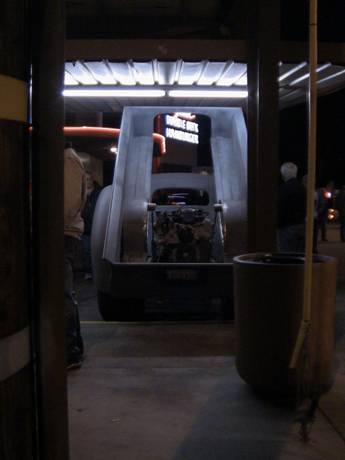
Things went well at Bob’s including one fellow who wanted to contribute money to the project, in the hundreds of dollars, for a spot on the contributor placard. That’s a wonderful response to the car! It got LOTS of interest.
12/19/11
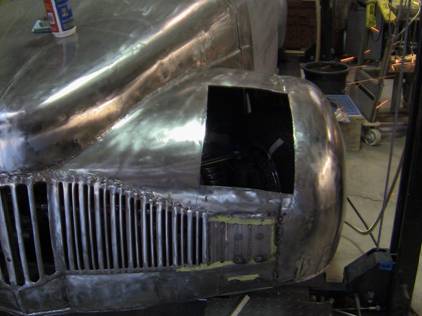
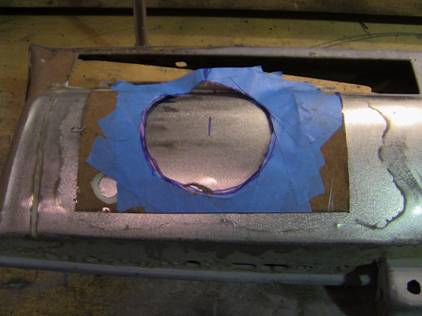
Another breakthrough day on the bodywork. I cut the wheel well out of the right fender, and created a new opening. We will weld in the new rim tomorrow, and add some metal to cover some gaps. This has freed up the front end design, and eliminates a sticking point for me on the way the wells looked.
12/20/11
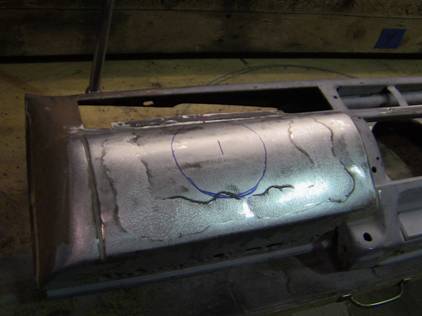
Today we attacked the LF wheel well opening:
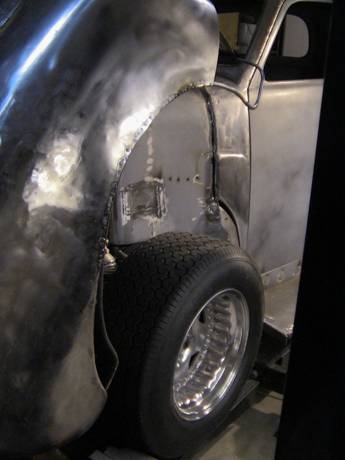
The opening, made from solid 3/8” rod, is welded in on the inside. We’ll fab up the front filler and beat the rear quarter piece into the revised shape and weld them back in.
I’ll need to reinstall the two removed flat braces from both fenders.
Next we’ll attack the lower portion of the cowl where the fender comes down. I cut those shoulders loose and pushed them in for clearance.
12/22/11
The second time around on the left front fender looks good. I did some additional welding of cuts, etc., and JJ ground those down. We also final-gapped the right side of the hood at the cowl, all the way down to the fender. This requires a LOT of small welds, cutting, and grinding. That gap now looks great.
PBB did a little bit of brake work tonight. I welded in three tabs for him, ground the welds, and did all I could on those tabs. He needs different fittings to route the lines in the most attractive way, per my suggestions. So no more will be done on the brakes until mid-week next week, once fittings are sent.
We are going to use a through-the-frame bulkhead fitting to allow us NOT to go under the frame rail. Safer, and much more attractive.
I am going to Bob’s Toluca Lake again tomorrow, for our second time there. The manager, Mark, is departing his career there as of tomorrow, so henceforth it will be Leo who will be the go-to guy. Leo likes the truck and me, and wants me to consider bringing it to their new once-a-month Saturday night thing.
12/24/11
Met with Mark. NICE, NICE GUY. We’ll be in touch regarding him selling solar for me.
The install went well, as did the leaving later on. LOTS of questions, lots of interest. This inspires me to get moving on getting it running. PBB has to get more fittings to continue on the brakes. I can move on the steering column. We adjusted the front end today and got it nearly dead tight on both sides. As soon as we install the alignment pin system, that all will be handled. The more user-friendly lift system switches worked out great mounted to the radio portion of the dash panel. The air board has one leaking fitting. I’ll address that tomorrow.
I think I dropped the trailer hitch receiver pin lock keys on the bumper and drove away after dropping the KK back at the house tonight. Against my wishes, Kelly had me keep the three keys together. Now, not so good an idea.
JJ and Kelly and I are all stoked on the art deco approach, and the three blue glass fins in particular. This is fun.
12/25/11
I drove the route to ColdStone and back looking for the keys. No good.
So I’ll cut the hitch off and get or use a simple pin and clip.
We are sending off some info to Stacey David for possible mention on his show.
Bob is making a list of SEMA vendors appropriate to sponsorship on the KK. This week will see us actually doing construction work, so this will dent our time on the KK. I was getting used to this being my everyday job.
I don’t foresee Crow actually doing much on the project, notwithstanding his interest, capabilities, and talk. He has his own shop to maintain.
We carved the rear fenders’ trialing edges to allow for removal of the rear tires when the bed is raised. They look GOOD. More and more little refinements are adding up to some noticeable improvements.
12/27/11
I nipped off the hitch pin, so that’s done. JJ and I looked at the right running board, and I started in on bending the kerfed ¼” x 1” bars for the front and rear ends of the board. I got the rear done, and then noticed the fender does not stay level near the outer edge of the running board. I have a ½” wood shim under the fender where it goes under the bed, and this is partly kicking up that front corner of the fender lip. I did it to gain clearance for the tire. I now find the tire/wheel has been spaced out about a half inch by spacers and nuts to achieve this clearance. I’ll try removing the spacers behind the wheels FIRST before carving up the fender. I may still need some fender adjustment, but the wheel offset is an issue unto itself. I have some spacer plates which I may employ here. I prefer to just eliminate the spacers and gain a little breathing room on the fender clearance. This is particularly important as the front wheels have a much deeper recess from the fenders, and this extra space does not look good to me. I am unafraid to modify the fender given what we’ve accomplished in the last week. But why do it if it’s not necessary?
PBB has asserted his belief that the front A-arms can be adjusted OUTWARD to tighten up the front wheel and fender clearances.
JJ and I noticed that the fender modifications we did made a substantial difference. The front wheel wells look much more balanced, and took away some of the hooding of the front tires. I makes the truck to a[[ear two inches higher, which it is not.
This is good.
I MIGHT jack the front up an inch or so at some point. For now,k it fits nicely.
The hood also fits well. However, the bed has started shifting about an 1/8” to the right on closing. We do not yet have alignment pins in place, which would cure this. But perhaps some massaging of the pivot holes (AGAIN) might be needed. I really don’t want to mess with the pivots at this point, as the front gaps are at super-tight 1/8” reveals. There is NO room to mess around.
All part of tightening up the gaps and fitments.
The right door began NOT latching a week ago . The latch is buried in the door, and is difficult to see, even with a light. Apparently a wire strung through a piece of metal was hooking itself on a lip of sheet metal inside, causing the locking latch not to drop. I also needed to move the strike pin on the jamb to the outside about 3/8” (grinding it out) to get the door the close flush.
All good again.
12/29/11
The right rear fender has received some attention: with removing shims, setting the rear wheel in about ½” and preparing the running board for remaking, we found the fender was off too far for good taste. So I cut out the leading corner, put in a new lower rod (WAY too much work, and didn’t end up being where it was needed), and POUNDED the new piece into shape. I mean really pounded on it. It took most of the morning, and it is welded in. I further hammered and dollied on it to get it more appropriate. It looks good, and I now have made a new rear ledger, if you will, to carry the trailing edge of the running board at the fender. I’ve got the gap just about 1/8 for most of the fender. The fender itself has a dip in the middle, which will get filled eventually. I’m debating about putting more metal along that edge.
For now: NO.
Kelly and I pulled the running board off, and put it back on, 3 round trips. I got the new ledger around the back of the cab PERFECT, after two tries. I added to the vertical and horizontal portions of the 1.4” x 3” angle iron structure, and that has tied it all together there. We also got the 6 stiffeners under the rear portion of the running board, and that has straightened that right up. I still think I’ll resheet it. Nick suggested going to heavier sheeting, like 1/8”, and again reiterated his opinion that we are doing great on this. I know nothing about shrinking metal with heat and quenching (have not tried it), and asked him for some pointers.
Nick also commented how nice lead would look on a lot of the metal. So I am going over right now to get some from him.
I am building a new shoulder area to receive the fender, and it looks good so far.Randy came by Friday and just dubbed us the Metal Maniacs. He remains impressed, and reiterated we are doing good work, way beyond his comfort level.
The bed closes the same each time now, and I need to trim the right front panel to regain the 1/8” gap I had before the bed relocation., The corbels line up nicely, and I’m tempted to bondo the lower portions to see how they really match. I need some alignment pins first, of course, the mate the bed reliably to those corbels. I’ve tuned up the running board on the right, as in rebuilding it, and the lower panel fits pretty well between the running board and bed, but needed to move back about an 1/8”. The trailing edge of that panel needs a little build-up to match the revised curve of the rear fender.
JJ and I picked up a sheet of 1/8, some flat, that fence 2x2, and more round stock.
Randy noted concern for the overlapping ramps I have on the lift, feeling the edges were not rated for such loads. So I beefed up the ends of them with lots of steel and feet of welds, and used up the remaining gas in the MIG tank. I just filled that a couple of weeks ago! Perhaps leaving the valve on overnight from time to time was costly. Lesson learned.
I’ve left several messages for Rob Moore about completing the transfer case. I will hound him this week to get the finished case done, and then send him a CV joint for final quote, and hopefully the making of the two short shafts.
Salim dropped by, was amazed at what we had done, and provided P{BB another forum for how we need to augment the mounting of the engines. Yeah, yeah, but after the exhaust gets done.
PBB has received the bulkhead fittings, and we’ll drill the frame tomorrow (9/16” diameter) tomorrow for those two fittings.
1/10/12
Got the two bulkhead fittings, in, and ran some brake lines to the rear. Bob temped up a piece for the front run, involving some curves, and will attend to making the real line tonight. He needs a little more line for the crossover runs.