| |
|
| |
|
|
|
|
2/26/09 The
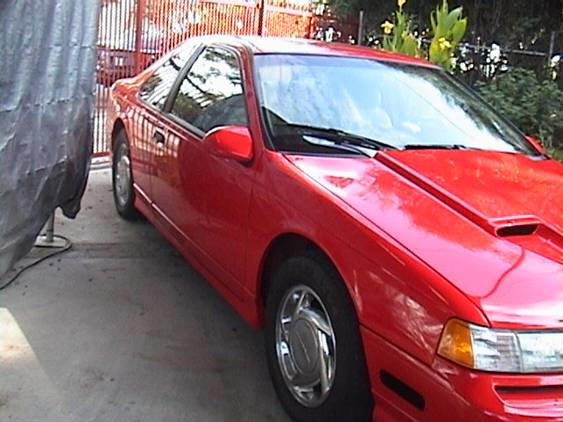
Condor sits atop the rear rack in the garage. If you read back aways, we
were expecting the motor to be done early November. In sum, the wanna-be’s like QMP and Deeds make several little errors which add up to BIG problems. Deeds’ pressure regulator plain simple failed, costing me $3,000. QMP outright missed several important things like clearances, balancing, and cleanliness of assembly, particularly on the 348 engine. This is why using veteran and widely respected builders like Duttweiler can be life (and wallet and time) savers. Having Kenny build this from day one would have saved me literally years and years and tens of thousands of dollars.
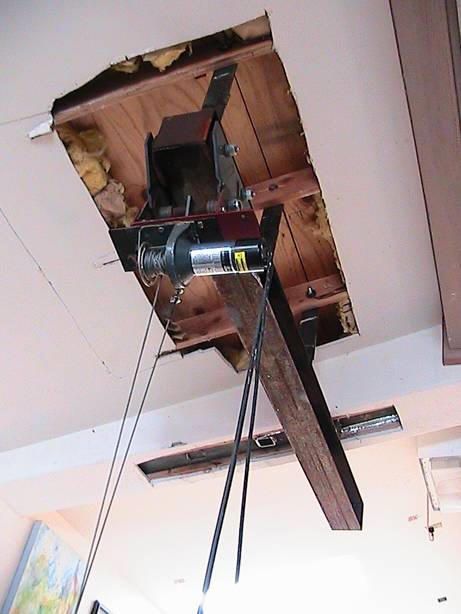
3/23/09 Roy is scheduled for tomorrow to set the motor and trans in place. My idea is to mount the sliding hoist back up in the ceiling first. Roy is bringing his cherry picker, so we’ll see if we just go straight to install.
3/27/09 So John and Roy did come, and we spent the first part of the day doing two tasks: Roy got the engine and trans bolted up
while John and I went for lift pulley hardware, and then we three got the lift system back working. I used the winch formerly employed to raise the FC body. With just some minor drilling, I remounted it to the fixture we had created for the other motorized winch (which is presently junk). The cable on the black winch is quite flattened I some sections, but appeared capable.
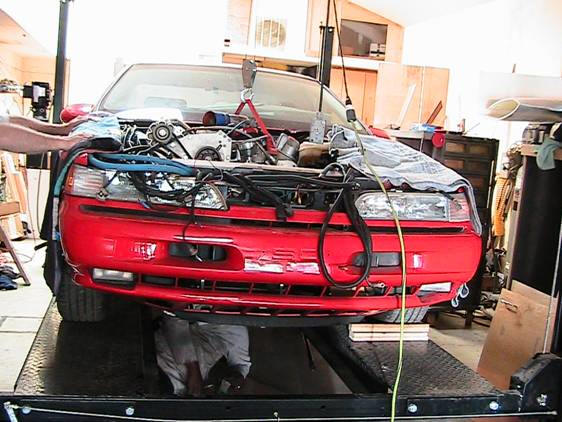
And with that bolted up, we needed to make a snatch-block system, which is a pulley to double the load capacity of the winch and snatch the engine (load). A quick trip to Grainger and $37 and we obtained that. The remainder of the afternoon was actually devoted to putting the motor in the car. It was VERY good we used the systems we did. That is, using the rack to get the car up off the ground, moving that rack back about 4 feet to position it properly under the lift system, and using the electric winch on the trolley hoist apparatus. It had not occurred to me that now that I had moved the rack FORWARD to accommodate the new apartment area at the back of the garage, that the engine bay of a car might not position well under that hoist. It will probably work just fine for the KiloKub, but some creativity in the future will be required for any front-engined removals and replacements using that hoist. I MIGHT have to straddle the two lifts with one car to accomplish that, OR weld another section of I-beam onto the existing trolley track.
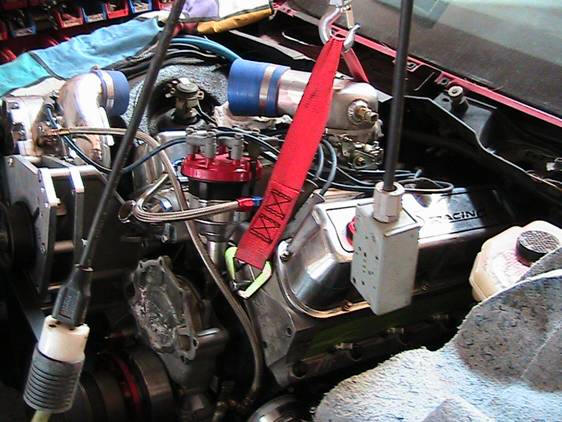
This all summed to allow us to do what we needed, both quickly and safely and rather easily. There were suggestions from Roy and John about other ways to accomplish certain aspects of the install and we, as a team, all made it happen smartly. The install now sits with the engine and trans in the chassis and the tailshaft sitting on the lift jack.
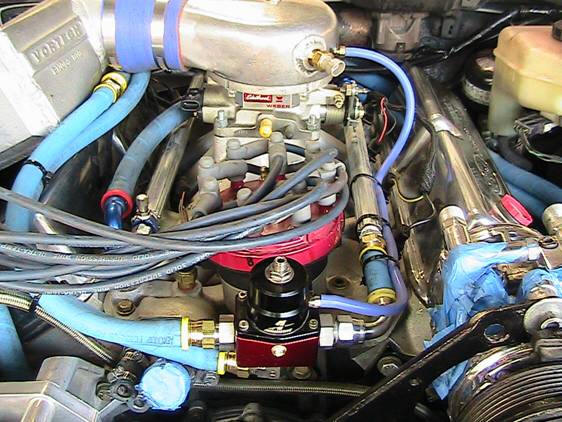
The left mount is sitting in position, within a 1/4 inch of perfect, while the right mount is jammed up a few inches and not settling in. My goal is to get the bolt/pin through the left mount, as a place of starting, and then do what we must to get the right side mount to come together. Luckily, John and I found the trans crossmember, so we have a great place to align that end of the drivetrain. With those two points in place I sincerely hope we can make the right mount behave It is particularly critical, as the micron thin lack of interference with the blower and hood is all based on the height of that right mount. There is just NO room for ANY error in this system. The pix don’t really do the tight clearances justice.
The blower in the left of this picture JUST fits under the passenger side hood scoop, once the engine sits down another 3 inches on that passenger side. John and I will endeavor to do that Monday, including bolting up the rear (trans) crossmember. I need to go buy a 5-1/2” x 7/16” x 20 thread bolt and locking nut to go through the left side mount. We have the bolt for the right (passenger) side mount. We’ll have to scrounge for some bolts for the crossmember. OF COURSE we had ALL these bolts somewhere. Given the movement of the car to Jay’s and back twice, and the years of it moving around the garage, it is not shocking we are having some trouble locating a few parts. It is a HUGE relief to see all this iron and aluminum INSIDE the car now.
3/29/09 I took Jay to lunch today, and paid him the remaining $1100 due on the KK in cash. So what now remains to have him complete the install is about $1500 over and above the already paid $1300 plus $200 credit for the actual dropping in of the engine. Jay says he will come over here and start on the completion in about a week. Jay feels he had the driveshaft at his place, and found a couple of other things for the Condor since I removed it.
3/31/09 John and Roy and Randy were all here today. Only Roy remained while JJ and Randy and I went on an extensive trip looking for gaskets, basically taking about 3 hours out of the day. Short story, I did get water pup and exhaust gaskets. Now to find all the little bolts, brackets, etc. to install the water pump, AC bracket and compressor, power steering, and alternator. I surmised that the driver’s side motor mount was installed upside down. It was in fact in correctly, then John and Roy decided it was wrong, and turned it over. This was last week the day we dropped the engine in. So we turned it back. We got the front mounts in and bolted, and the rear crossmember in and bolted. The left front mount appears cracked all the way through the rubber. I was unable to locate some urethane mounts today. Regardless, I will be putting a steel “torque cable” on the left front of the motor down to the frame to keep it from lifting and shredding that mount. While under the trans I noticed the not-to-standard appearance of the driveshaft tunnel modifications. Granted, they are UNDER the car, and most likely will never be seen by anyone, but I want that area to look nice, as I know it’s there. So JJ and I will do some hammer work, perhaps a weld or two, and do some bondo work. I’ll test fit the driveshaft FIRST, however.
4/3/09 Roy got the driveshaft in, and we have rolled the car forward about 40 feet and back again, twice. I’ll look under on Sunday and see how the clearance is. I presume at this point it is good, and if so, will commence the above-mentioned bondo work. The right rear tire is going flat every day or two. I’ll make us of the rack jack and get the rear up and take the tire down the street for “repair.”
4/5/09 It’s been a week since Jay and I talked about him getting back on the Bird and finishing it up.
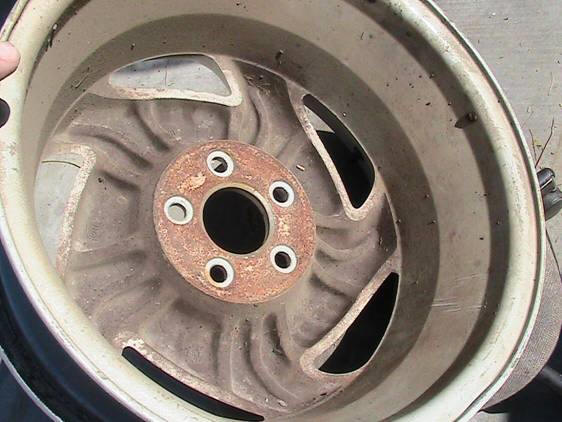
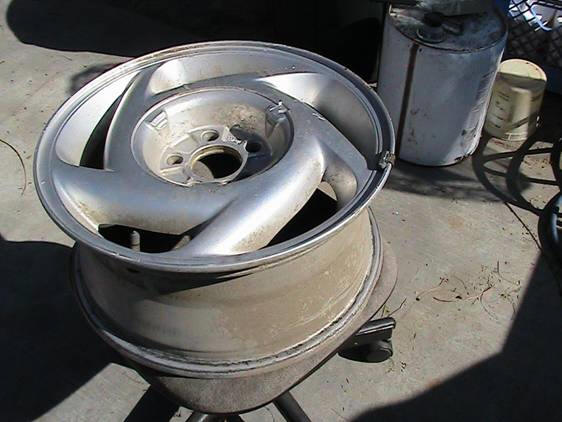
4/18/09 I dropped by Jay’s, and we discussed WHEN he will commence the final work on the Bird. It now appears sometime near the end of the month (April 2009). I need to secure a fuel level sending unit for the gas tank, and line up some urethane front mounts. Jay mentioned a fellow who does wheel widening, TorqueThrustCenter.com, and I have emailed Terry there regarding widening the rear rims on the Bird about 2”, and entertaining the thought of making a 17” version of my wheel, which would provide more clearance for the rear suspension. I suspect a new billet version of that wheel is going to be WAY expensive, perhaps a couple of thousand for two wheels. We’ll see what Terry has to say. There is another manufacturer, Oasis, down in Huntington Beach, and I may give them a ring as well. I did see a very nice wheel last night at Bob’s on an early 240-Z. I will inquire next week about those wheels. It might be easier to order something like that. There just hasn’t been anything I’ve seen out there that I like better than my saw blade wheels.
4/22/09 After a couple of conversations with Juan Hernandez, owner of Oasis Wheels in Huntington Beach, the following is what we know:
My wheels are cast aluminum, one piece, 7” wide, with a 6” backspace. I think I can fit another 2” to the inside on the car at present, using these same wheels. Oasis would charge about $5000 to remake these wheels from scratch as wider pieces. Obviously, this is beyond me. A set of cool Oasis Teardrop style wheels would be around $2000, still pricey, but nice. These might have to be in 20” size, not my preference. Juan referred me to Scott at SKH who can widen my existing rear wheels for about $500 for the pair. This is obviously more like it. Once the car is up and running we’ll do some testing with the rear suspension to see if the rear sway bar can be modified to provide more clearance. I want to put about a 325 mm tire. However, Flip’s Tire is telling me that no one makes that wide a tire in 16”. I’m hoping for Goodrich G-Force Radials. The widest Goodrich is a T/A, which is NOT the performance tire of the G-Force series. The T/A can be had in a 2.95 x 50 x 16. This is about an 11.5” tire, but not good grip. The 325mm tire equals about 12.79”, which would be very nice, IF in a good performance tire.
5/19/09 Roy finished putting in the new mounts today. The old ones looked just fine. Whatever. I have, without success, attempted to hook up with Jay for almost a month. He is a month late in getting on the Condor. He also has misplaced some parts, like the critical serpentine belt idler, etc. So now we have some spacers to make for the AC pump and power steering unit, a remake of the alternator bracket to accomplish, and the location of the elusive idler. With that, we can size the length of the main belt, and get on with that. Jay must do the rest, such as the fuel pumps, fuel pickup, exhaust, etc.
|